Sep
Quick steps to create your first Salesforce Lightning App
Lightning is one of the feature that will surely help your business grow faster. It’s responsive, fast, and can be used on the go through your mobile. Framework:
- The Lightning Component framework is built on the open source Aura framework. It enables you to build apps completely independent of your data in Salesforce.
- Its available at https://github.com/forcedotcom/aura
- Sample code: <aura:iteration> and <ui:button>
- The aura namespace contains components to simplify your app logic, and the ui namespace contains components for user interface elements like buttons and input fields. The force namespace contains components specific to Salesforce.
Prerequisites:
- Create a Developer Edition organization
- Register a Namespace Prefix
- Define a Custom Salesforce Domain Name
Impact on Switching to Lightning:
- Using Solutions to resolve your customer cases? Solutions are not supported in Lightning.
Workaround: Migrate to Lightning Knowledge, which offers standard objects that work just like other objects in Salesforce. Lightning Knowledge helps users find answers fast, with Knowledge Search, Knowledge-specific components, and the Knowledge homepage. - Before migrating, get familiar with the Lightning Knowledge Limitations, so you’re clear on what’s not included, too.
- Dashboards created on lightning are unable to be scheduled to refresh automatically.
- Users can’t create additional Reports & Dashboard folders.
- List View Restrictions: Inability to grant visibility to users based on Role/Membership of group.
- Live Agents: Not supported in Lightning. What to do?
Decide which users can work without this feature, and migrate those users to Lightning Experience. - Documents Tab: Users can see the tab and objects in Lightning Experience, but when users open them, tabs are displayed in Salesforce Classic. What to do?
Migrate to Salesforce Files to save, share, and collaborate around documents.
Planning to Switch to Lightning? Check your org readiness through “Lightning Experience Migration Assistant.”
- Go to Lightning Experience Migration Assistant from sidebar setup.
- Use the Check Readiness tab to find out the components and functionality that are compatible with lightning and their workaround.
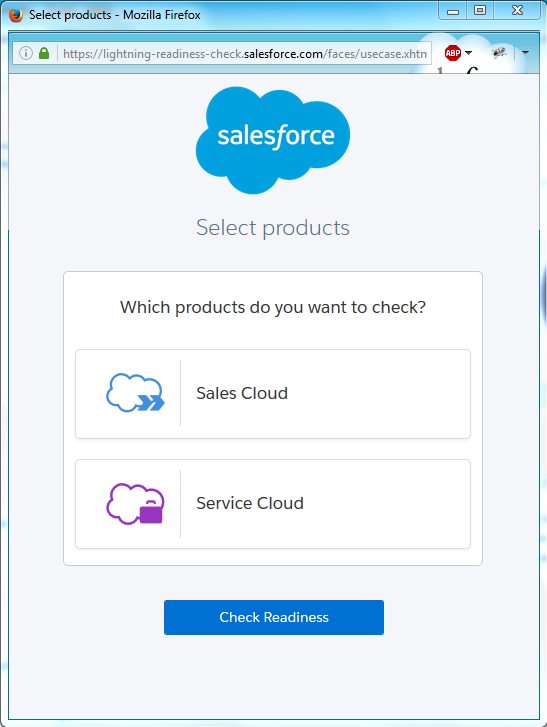
- Once the readiness check is completed, the Lightning Experience Readiness Report is sent to you via e-mail
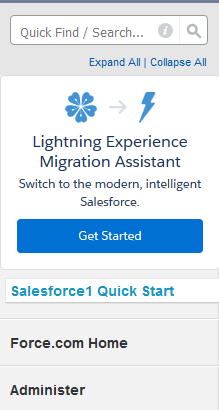
Enable Salesforce Lightning
- Go to Salesforce1 Quick Start or choose Get Started from sidebar setup.
 2.Switch to: Turn It On tab
- Click Enable.
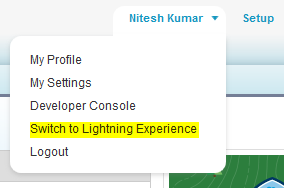
 Switch to Lightning:
- Click on your name next to setup.
- Choose “Switch to Lightning”.
 Developing Component:
- Open Developer Console, Click File | New | Lightning Component.
- Enter Name and description for component. e.g. helloWorld
- If you choose Lightning tab checkbox, it embeds the force:appHostable interface which enables the component to be added to the navigation menu in Salesforce1.
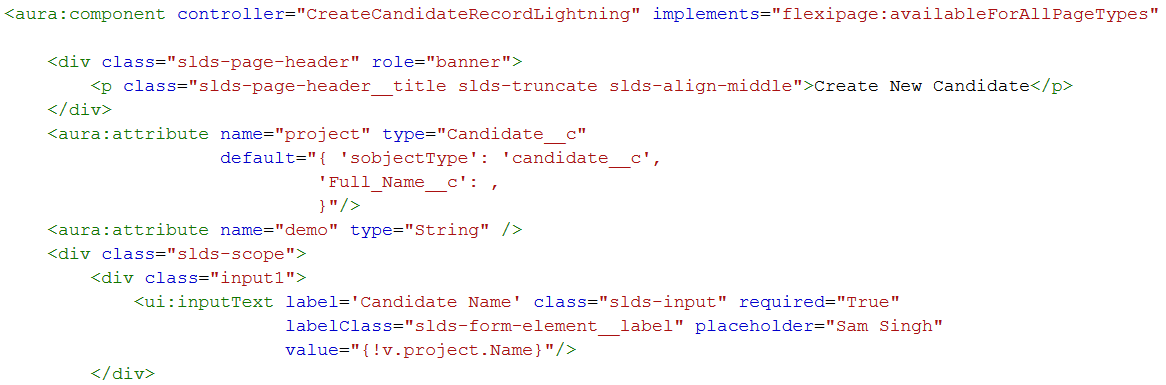
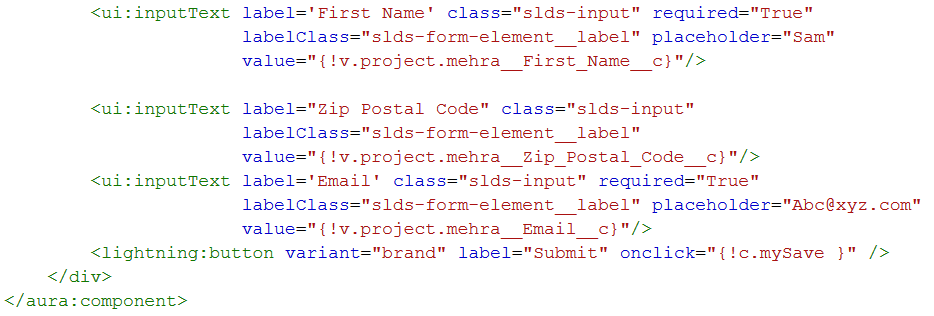
- E.g. <aura:component implements= “force:appHostable” > </aura:component>
- Click Submit button to create your lightning component.

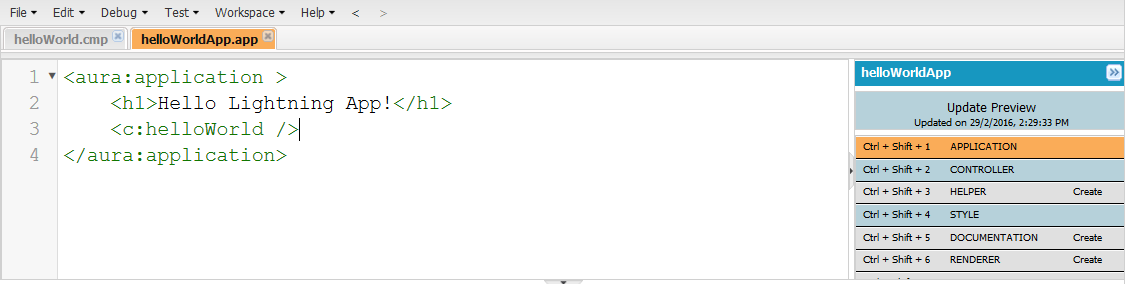
 Create Application:
- To create application in lightning, Click File | New | Lightning Application.
- Enter the name, and click Ok. E.g. appName.app resource. You may set name accordingly.
- Now use c:helloWorld to refer the component helloWorld.cmp using the default namespace c. If your organization has a registered namespace, you can use it to reference. To see the Changes you’ve made, Click Preview.
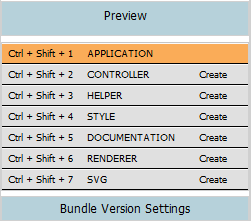
 Controller: To create a controller for your lightning bundle, click “controller” on the sidebar of the component next to shortcut “Shift+Ctrl+2” on the right.
 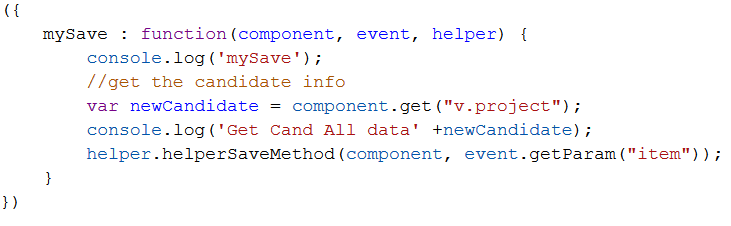 The controller acts as a client side action that handle an event and call a server-side controller action.
The value providers for a component are v (view) and c (controller).
- Example, {!v.accounts.id} accesses the id field in the accounts record.
- Example: {!c.doInit} invokes the doInit method in controller
Helper: Helper functions are similar to client-side controller generally used to pass any argument required by the function. It takes in the value parameter set in the controller through the “item” argument.
A helper function can pass in any arguments(component,item,callback) required by the function.  Below is the apex class to perform DML operation. It contains @AuraEnabled annotation which is used to expose an apex method to be used up in lightning component.
 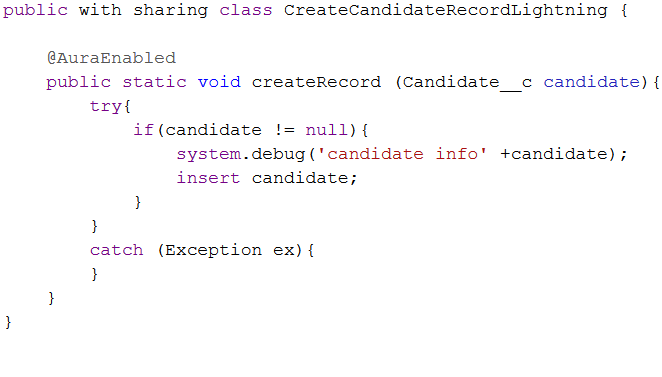 Apply CSS: The top-level elements match the THIS class and render with a grey background.
Note: To use the Salesforce Lightning Design System(SLDS) in your application use extends=”force:slds”
e.g. <aura:application extends=”force:slds”> </aura:application>
You may use slds classes for lightning UI. Go to SLDS 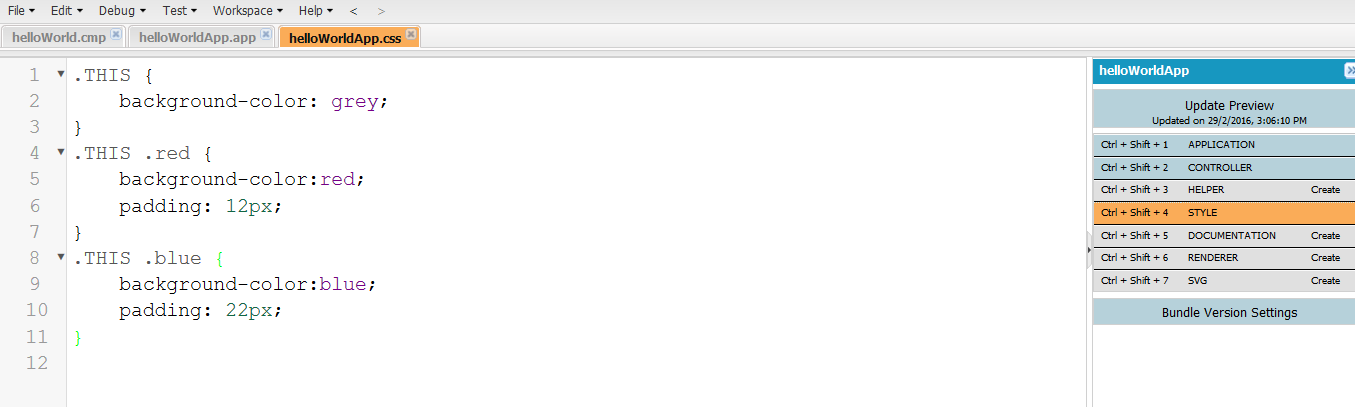 Documentation:
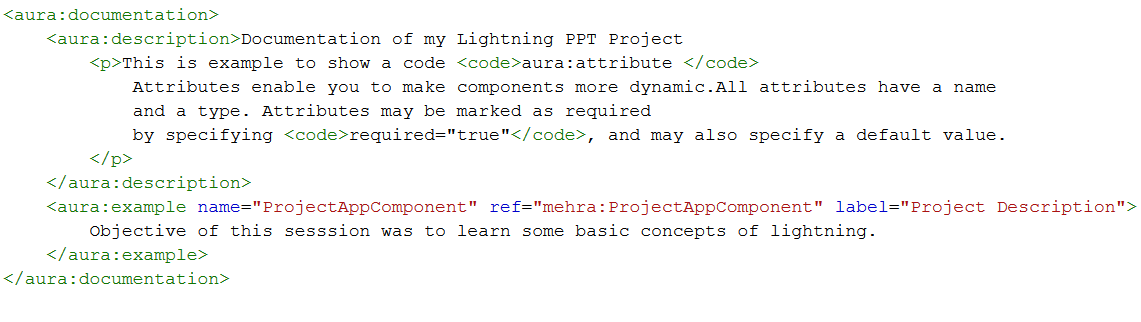
- Documentation helps others understand and use your components.
- Types of Documentation:
- Documentation definition (DocDef): Full documentation on a component, including a description, sample code, and a reference to an example. E.g. <aura:documentation> </aura:documentation>
- Inline Descriptions: Text-only descriptions, typically one or two sentences, set via the description attribute in a tag.
g. <aura:component description=” Represents a button element “>
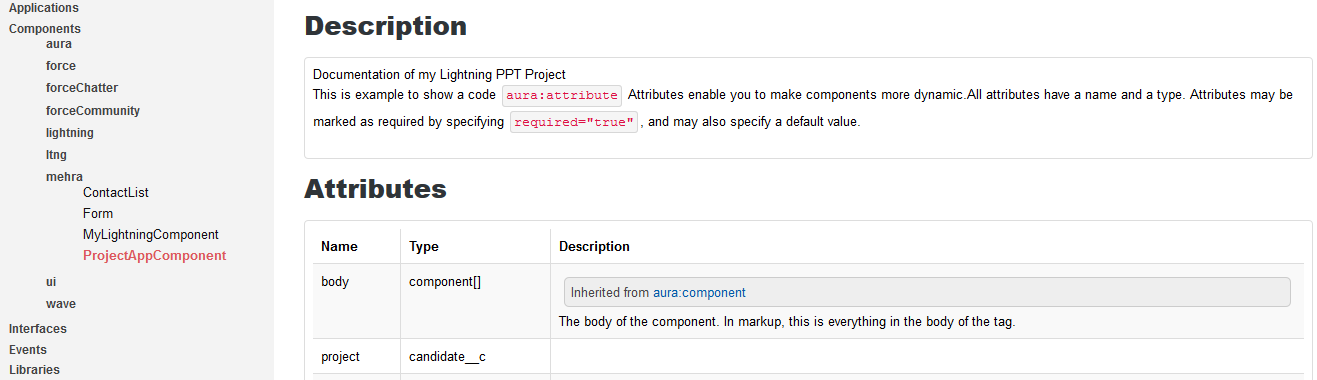
- The documentation you create will be available at https://<myDomain>.lightning.force.com/auradocs/reference.app where <myDomain> is the name of your custom Salesforce domain.
 This concludes the complete application flow of your first lightning App. Wasn’t this easy?
Please add your comments in case of any questions. Happy learning!